DIY Wire Cage Light Fixture
Every once in a while, a DIY project presents itself that is so easy, so fast, and yet then completely perfect for a space that you can't help dropping everything and doing that project. This DIY wire cage ceiling low-cal fixture is just such a project. It'due south unbelievably simple and straightforward, and the cease event is completely satisfying.
 View in gallery
  View in gallery
 The following article is a footstep-by-step tutorial on how to create and mount your own wire ceiling low-cal fixture.
 View in gallery
 DIY Level: Beginner
Materials Needed:
- Wire grating (example uses a two"x3" wire filigree)
- Metallic cutters (aka "tin snips")
- Electrical record and/or small wire
- Spray pigment
- Ceramic low-cal seedling mountain
- Edison LED low-cal bulb
- Spiral hooks
 View in gallery
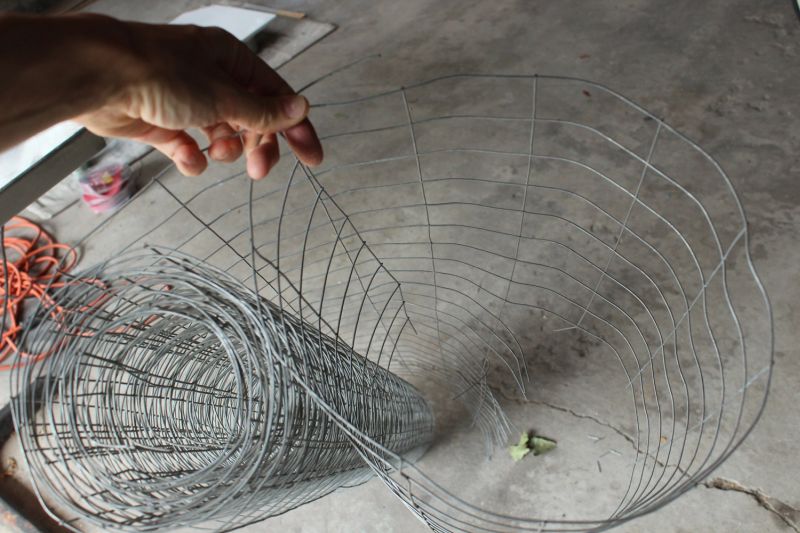
 Brainstorm by determining the size, either past circumference or diameter, of your desired light cage. Mark this length on your roll of wire grating.
 View in gallery
 Use tin can snips to cut forth the outer wire line of this distance, taking care to keep the line. Do the same for your desired light fixture tiptop. When determining the width and height of your fixture, keep in mind the span of the low-cal bulb(south) that the cage will mount on top of. In other words, make sure your cage is wide enough for your bulbs and as well deep enough for your bulbs so the cage doesn't impact the calorie-free bulbs in whatsoever way when it's mounted.
 View in gallery
 Y'all should cease up with a cylindrical shape of wire grating, with even edges on all ends.
 View in gallery
 Grab some electric tape (or pocket-sized wire, if you're not planning on painting your wire cage) and adhere the grating edges together to create a complete cylinder.
 View in gallery
 This instance used electric record because it stretches and is flexible without existence bulky. Keep the wrap-angle sharp and so you make fewer rotations of the tape over your ii connecting wires. If you're using small-scale wire, simply wrap plenty small wire around the connecting grating wires so as to keep them securely together.
 View in gallery
 Of form your tapes wires will exist a trivial thicker than the others because there are two wires plus record at this articulation; withal, the connection will be less obvious once you paint the fixture later.
 View in gallery
 Set your cylinder down and cheque for evenness in its shape.
 View in gallery
 If there are parts of your cylinder that are uneven or slightly bent, bend them dorsum into a smooth, circular class.
 View in gallery
 Set your newly rounded and smoothed cylinder on top of some flat wire grating.
 View in gallery
 Use your tin snips to cutting the flat wire grating all the way around your cylinder, keeping well-nigh 1" overlap of the flat grating. This will exist the bottom of your wire cage, and you desire a piffling overlap to be able to connect the flat grating to the lesser of the cylinder.
 View in gallery
 Don't worry if all the overlap isn't exactly fifty-fifty; do the best y'all tin can, and what makes the most sense, with the wire grating you lot've got. Yous want all raw edges on the flat grating for overlap.
 View in gallery
 Utilize pliers to bend the overlapping raw edges to a ninety-degree bending, precisely at the point of connectedness with your cylinder wire grating.
 View in gallery
 Prepare the angled raw wire directly against the cylinder's perimeter wire.
 View in gallery
 Tightly bend the raw wire over (or under, depending on how you're holding it) the perimeter wire, folding information technology dorsum most confronting itself.
 View in gallery
 Use pliers to pull the very tip of the raw wire through the grate.
 View in gallery
 The wire loop should be touching itself, and the connexion should be as small, tight, and efficient equally you can perhaps make it.
 View in gallery
 Repeat this procedure for each of the raw wires on the flat lesser grating piece. Accept care to maintain the cylinder shape throughout; don't pull the raw wires too tightly, and don't leave them besides loose.
 View in gallery
 You don't want the raw edges poking out every bit far as they probably are.
 View in gallery
 Take your tin snips and carefully trim off any excess from your raw wire loops.
 View in gallery
 Done with the hardest part! It looks good, doesn't it? Make any adjustments to the shape that you might need to make at this point, before painting.
 View in gallery
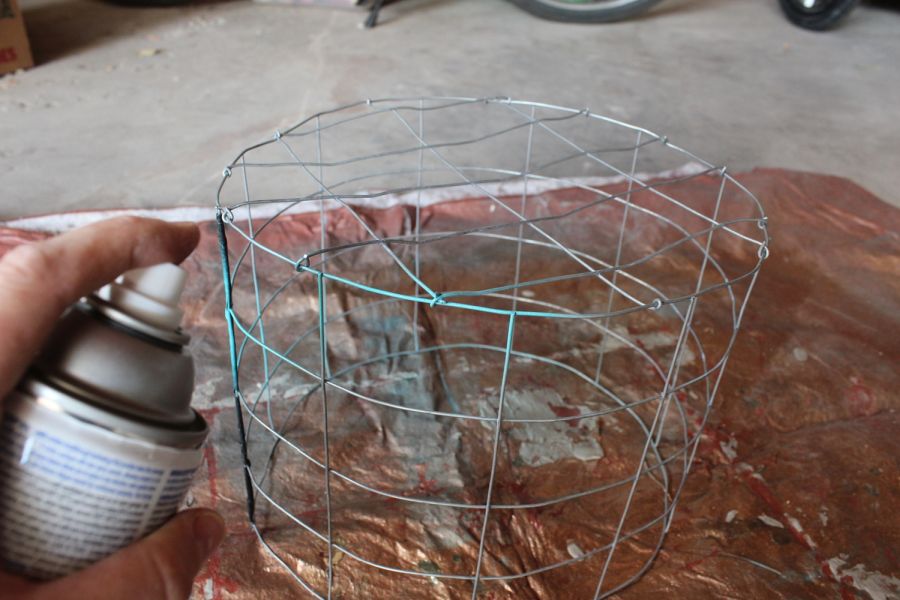
 Set the wire cage on a drib cloth and spray pigment 2-3 low-cal coats. Exist sure to spray all sides and from all angles, including the within-the-cage wires.
 View in gallery
 Let the wire cage ceiling light fixture dry completely.
 View in gallery
 When your wire cage is prepare to be installed, get out some spiral hooks that are the aforementioned color as your ceiling, if possible. You desire these to be as invisible as you lot can make them.
 View in gallery
 Setting the hooks aside for a minute, hold the wire muzzle up confronting the ceiling with the light completely centered.
 View in gallery
 Mark 3 or four equidistant drill spots, even with the cylinder's perimeter wire, onto the ceiling with a pencil. These volition be where your screw hooks will go.
 View in gallery
 Drill appropriately sized holes for the screw hooks at the places you lot've marked.
 View in gallery
 Screw in your screw hooks to the ceiling. Considering they're going into sheeting, these screws won't tighten down all the style. Merely screw them in until their flange touches the ceiling surface, then call it practiced. The wire muzzle isn't heavy, so they'll hold the weight just fine.
 View in gallery
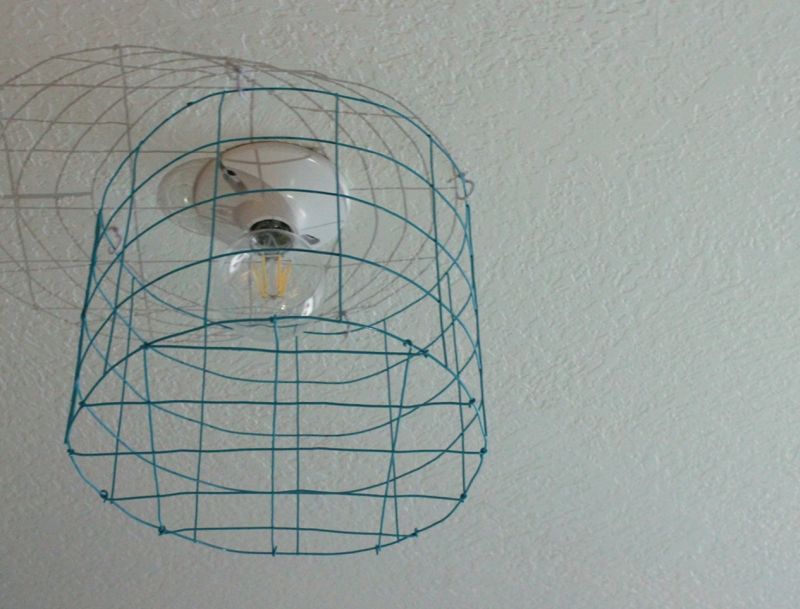
 Set the wire muzzle into the spiral hooks.
 View in gallery
 That'southward it. Seriously. The end.
 View in gallery
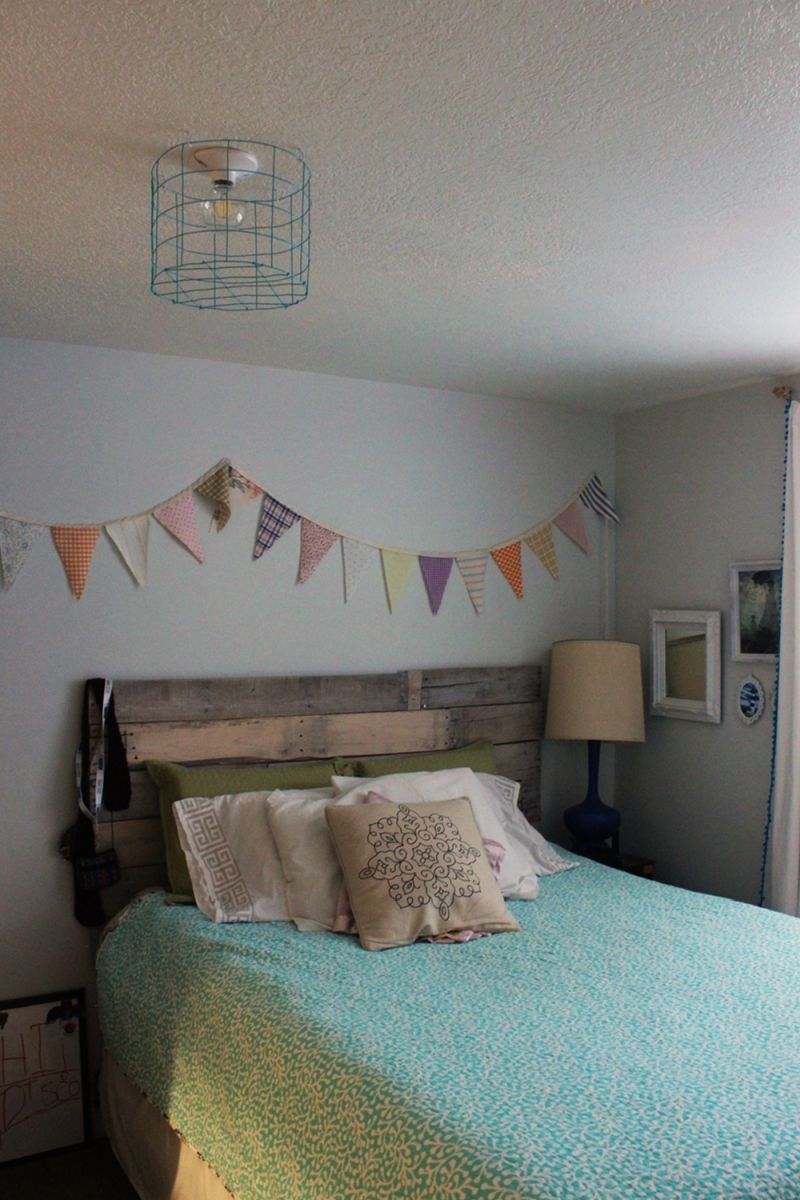
 For something so piece of cake, information technology certain makes a difference in the room's personality.
 View in gallery
 A inexpensive, generic builder-grade calorie-free was in here before. And, while this wire cage isn't expensive by any means, it's much more than stylish and unique.
 View in gallery
 Exist sure to employ a clear globe light bulb (or some other bulb you love) to maximize the industrial effect.
 View in gallery
 This aqua color was perfect for a pre-teen girl's bedchamber, merely I call back you could really accept fun with another colors. Black would be sophisticated, or gilt would be chic in a less kid-focused space.
 View in gallery
 Good luck creating your ain customized DIY wire cage ceiling light fixture. We hope you'll love it.
Source: https://www.homedit.com/wire-cage-light-fixture/
0 Response to "DIY Wire Cage Light Fixture"
Postar um comentário